This weekend, Cam and I decided to head out to Pharaoh Mountain for some ice climbing. I ordered the ice climbing guide for the Adirondacks, ADK Blue Lines, and it said that this was one of the most remote areas in the Daks. Charles let us drive his F150 pickup because there is a pretty rough road that leads up to the trail head, and my VW would not have enough clearance. This ended up cutting a mile from the approach, which still ended up being 2 hours.
.JPG) |
| Topo of Pharaoh Mountain, courtesy of the USGS. |
 |
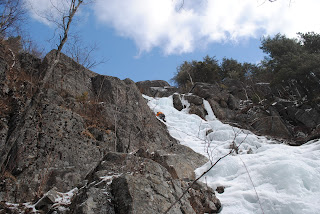
| This is the view from the base of the climb. We ended up taking the left route because the ice on the right looked a bit too thin for comfort. |
 |
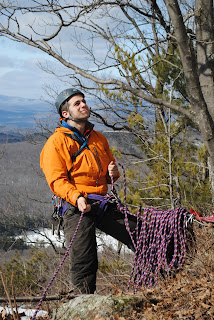
| Cam is all racked up for the first pitch... |
 |
| ...and here he is leading it. |
 |
| Up at the belay spot while I follow and pull the pro. |
 |
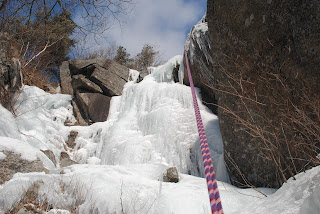
| I took the lead on P2. I set up a belay spot to the left of where the ice ends in this photo. |
 |
| Another view of my lead on P2. |
 |
| There were two choices for pitch 3. The one on the right is seen in this photo, but looked a little boring. |
 |
| Instead, Cam chose to lead the line on the left which had a nice vertical section and a drytooling finish. |
 |
| Here I am at the belay between P2 and P3... |
 |
| ...and Cam is racking up for the lead. |
We were both really hungry by the time we finished the climb because we left all the food in one pack at the base of the climb to keep a light load. The follower always climbed with a pack that had a liter of water and the camera. After taking in the spectacular view from the top, we set up to rappel. The descent took 5 rappels and 1 section of down climbing.
 |
| The view from the end of the first rappel. |
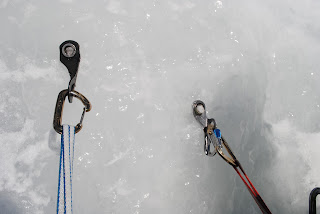 |
One of the rappels left us away from any of the belay ledges, so we had to anchor in with screws and set up for a v-thread. By this time the sun was fully out and it was a bit warmer than when we started. If it was this warm when we first arrived in the morning the ice would not have been climbable. My screw was melting out by the time Cam started rappelling so I clipped in to the screw Cam left in the ice and placed another screw in fresh ice to hang on.
|
 |
Here is the first out of two v-thread we had to make for the entire descent.
Back at the base we boiled up a liter of water to split in the freeze dried chili and macaroni we brought. Cam did one more short climb and then we called it a day, packed our bags, and set out for the walk back to the parking lot. Two hours later (7pm) we were back to the car and on the road.
|

.JPG)


